Shadows of Doubt DevBlog #12: HDRP Makes Things Prettier
Shadows of Doubt is a detective stealth game set in a fully-simulated sci-fi city! There’s been a murder and it’s up to you to solve it by any means necessary, with the condition that you keep a low profile. A unique mix of procedural generation and hand-crafted design enables every room of every building to be explored. Citizens go about their lives independent of the player as you watch from the Shadows, in search of crucial information. Read previous dev blog entries or visit shadows.game to sub to the mailing list!
This week as well as a new website/presskit, I’ve been updating the project to use Unity’s new HD render pipeline. It seems like an odd time to upgrade the graphics, but I’m doing it now because it’s quite a sizable technology shift in terms of shaders, materials etc, so thought it best to get it out the way now before delving back into content creation (which is next on the list).
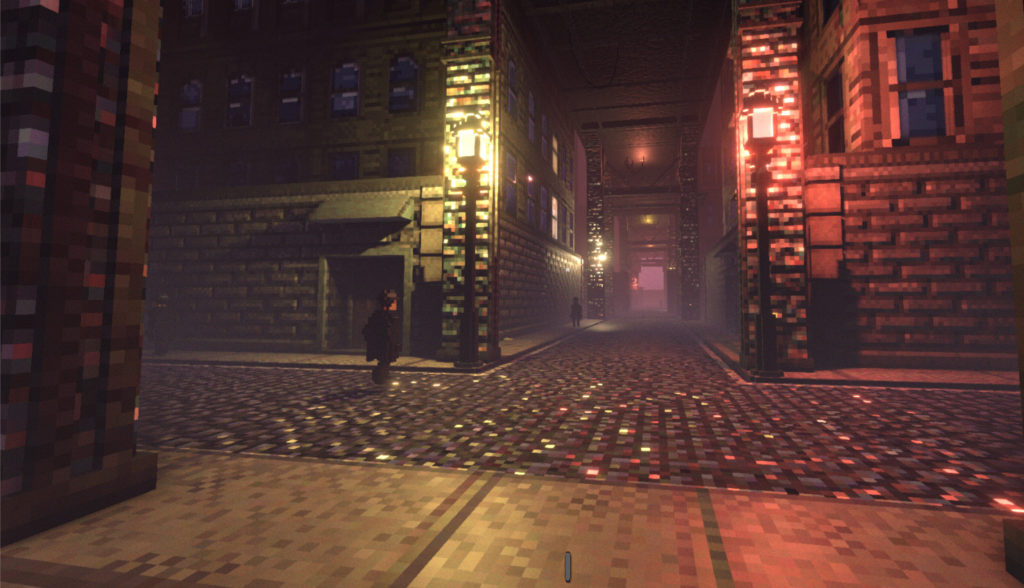
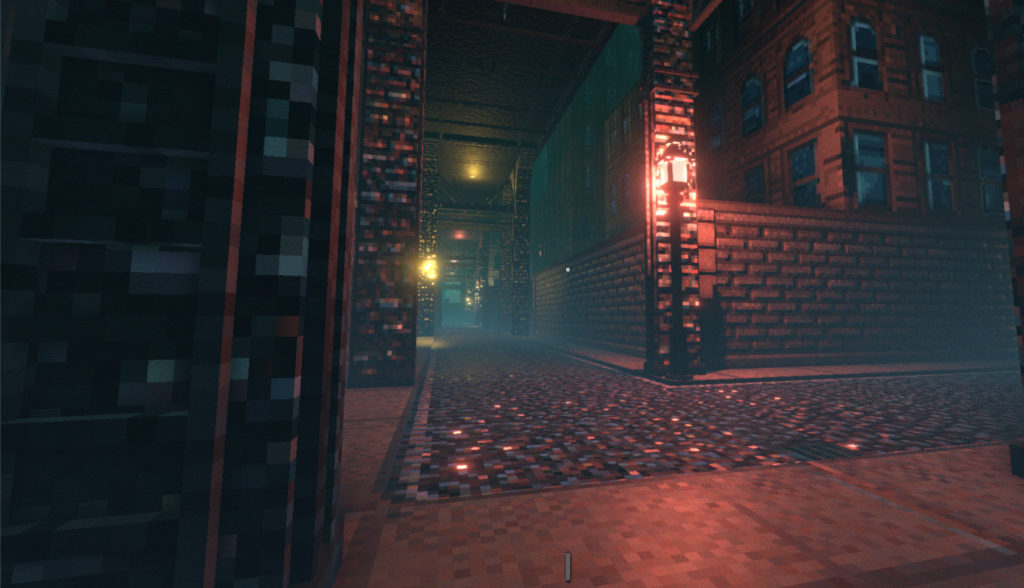
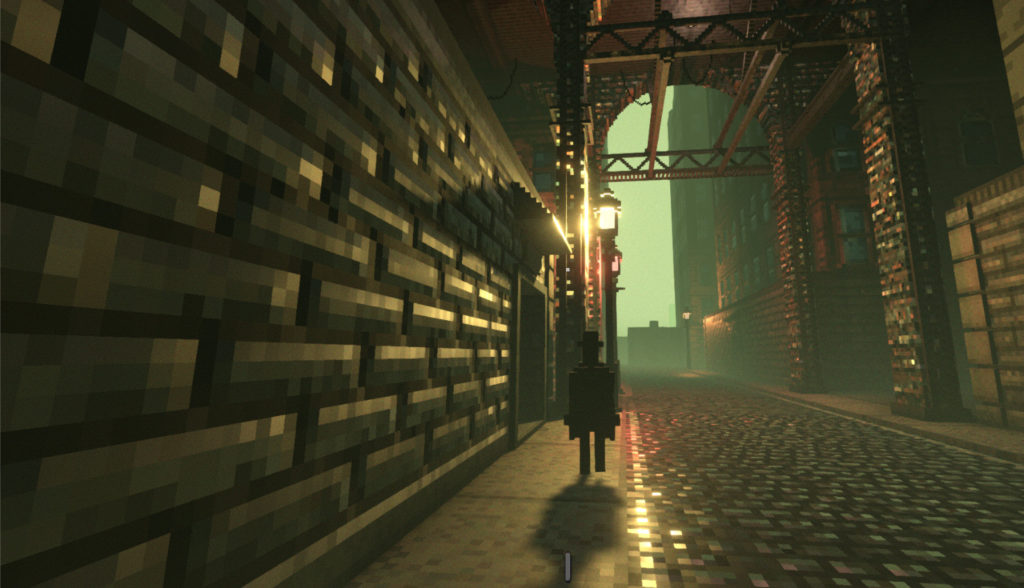
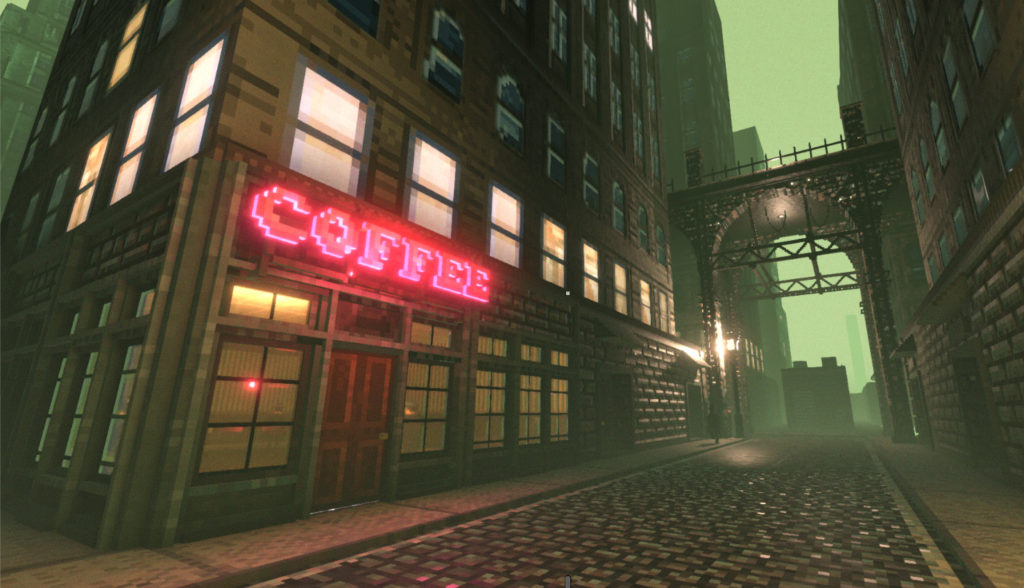
I expected a decent bump in general prettiness, but it has exceeded my expectations. The shiny new look trades some low-fi aesthetic for much moodier lighting, and it’s a compromise I’m more than happy with. Performance remains roughly the same, which I’m also counting as a win.

The biggest difference is the physicality of the surfaces and the behavior of the light on them. I especially love the cobblestones in the new renderer, they reflect light exactly how I imagined in my head when I first started this project. I’m really excited about how the game will end up looking, especially because I’ve got loads of plans for the exteriors (think steam vents, neon signs, litter, market stalls, hanging cables etc).

I’ll share my experience of the upgrade process in the hope this dev blog entry is useful to folks. It took me about a week’s worth of full-time work to get everything properly functioning in HDRP, and that includes time spent learning.
-Unity can do a lot of the work for you in upgrading to the new renderer. It will attempt to convert your existing materials to its use new shader, and convert your lights to the new system. It does an ok job at this, but I decided to re-make my materials from scratch in an attempt to hone my workflow.
-One of the main changes in the new default shader is that now the metallic, ambient occlusion, detail and smoothness maps are all sourced from one texture file using the RGBA channels. Unity will make one for you in the conversion process mentioned above using your existing separate images, but I couldn’t find a way to automate this after the upgrade process. This tool does a great job at packing different maps into the channels to be saved as a single image, so I’ve been using that.

-I had a weird bug where the upgraded lighting intensity being displayed was much lower than it was set to. Simply clicking on the light object in-game or in-editor seemed to correct this. After a couple of hours of being puzzled, the solution was to simply click on my prefab light sources in-editor. Everything is how it should be now. An odd bug but with an easy fix.
-Converting my project to use the new ‘light layers’ system took the longest because I couldn’t find any documentation about it. It turned out the options I spent ages looking for were hidden under easily-missable ‘additional settings’ + icons to the right of the regular inspector settings. D’oh! Anyways, after that it was fairly easy to work out- lights can now be present on different light layers and under the mesh renderer, you can choose which objects are affected by which layers.
-I have yet to explore the new decal system, but one of the reasons for upgrading to this version was to make use of it for details such as blood, bullet holes, chalk lines around bodies etc.

In my last entry, I talked about the previous year of development, and my wrestling with the scope of the game. I’m pleased to say the wrestling is over now- I have a much clearer route ahead. No more toying with massive shifts in scope, theme or gameplay. The most unique and fun thing about this idea is the simulation interacting with the procedural generation, and that will take center-stage now. Detective stuff aside, being able to look up at any window of any building and be able to decide to break into there is very satisfying. It’s something I’m going to build on as much as possible, by giving all my citizens various secrets and rewarding the player for uncovering them. The next few months are going to be about that, starting with an overhaul of the way I configure the interior environments.
The key to what I want to do is finding a balance of procedural generation and hand-crafted content. I’m going to be doing this through a new ‘floor editor’ that I’ve started making this week. The basic concept is that the buildings in the game are made up of different floor configurations. These are effectively blueprints that section off the floor into different addresses (eg the first floor of a residential apartment block might contain 4 or 5 different residential addresses plus a hallway).
Within each separate address, the game uses various variables from relevant sources to generate an interior. For an apartment for an example, the choice of furniture and decoration will be driven by the owner’s preferences. Even down to objects such as what books they have in their bookcase. Environmental storytelling is the key to interesting environments in games, and by using these variables in combination with the simulation to drive what is generated, I hope to achieve that. More on interiors soon!